You can keep your roofing system free from water penetration and damage with proper flashing. Water can come through any area, even a small opening. Flashing prevents water from reaching the roofing elements, whether chimneys or vents. But flashing can get damaged over time. Such damages are unexpected, and knowing how to fix roof flashing is a lifesaver.
How To Fix Roof Flashing? Six Steps To Solve Annoying Roof Flashing Issues
The following are the details to learn how to fix roof flashing.
Explaining Roof Flashing
Roof flashing is mostly made up of materials, including:
- Aluminum.
- Copper.
- Galvanized steel.
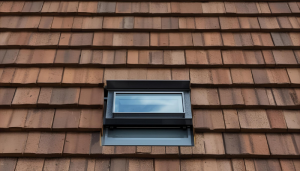
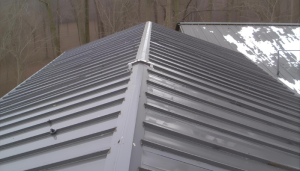
Roof flashing is installed at joints and intersections on the roof. They include chimneys, vents, valleys, etc. Their main purpose is to prevent water from reaching critical areas. However, weather exposure can damage roof flashing, leading to potential leaks.
Also, learn more details about Rooffixernearme.
Usual Reasons For Roof Flashing Damage
Understanding the primary causes of flashing issues enables you to prevent future problems. When you detect the issues early, you can fix them while reducing the need for frequent repairs. Usually, flashing is damaged for the following reasons.
- Continuous weather exposure.
- Improper installation.
- Natural expansion and contraction of the roof.
- Roofing materials’ aging and damage.
When To Replace Instead Of Repair?
Sometimes, just repairing the flashing is not enough. When the damage is severe, materials are severely corroded, and leaks recur, replacement proves a better option. You can also invest in new flashing for stronger protection and to prevent water damage. That can spread to the roof deck and attic.
Complete Steps In Repairing Roof Flashing
The following steps can help you fix damaged roof flashing.
Initial Examination
You must examine the areas where the flashing is damaged or wearing out. Mostly, signs include:
- Rust.
- Cracks.
- Separation from the roof surface.
- Interior water stains may also indicate flashing issues.
Remove Damaged Roof Flashing
Use a pry bar to lift the shingles around the damaged flashing safely. You can extract the flashing piece by removing nails and fasteners that secure the flashing. You must clean this area properly while removing debris and old sealants. It helps in preparing the area for a new installation.
Fabrication Of New Flashing
You need to measure the area that needs new flashing. Do it by cutting a piece of flashing material to size. Make sure it extends beyond the joint for better coverage. Tin snips are primarily used for cutting purposes in metal flashing.
Installation
Place the new flashing properly so it fits properly and can direct water away from the joint. Secure it with roofing nails or screws and place fasteners at specific distances to avoid movements. Ensure the new flashing is compatible with the old roofing materials.
Sealing Details
Create a watertight barrier using a high-quality roofing sealant on the edges and fastener heads. Make sure the sealant is smoothly covering all areas for better adhesion.
Restoration
Now, slowly reposition the lifted shingles over the new flashing. Secure them with nails according to your requirement. Applying sealants over exposed nail heads is effective for preventing water penetration.
Professional Help Is Also Essential
Although DIY users can handle minor roof flashing repairs, they need professional assistance in severe conditions. Professionals like Rooffixers can tackle these situations better, whether it’s extensive damage, safety concerns, or complicated roofing structures. They know the roofing industry standards and building codes to avoid any activities leading to issues.
Check out the services of Rooffixer for better roof flashing solutions.
Preventive Measures For Roof Flashing
You need to ensure regular maintenance of your roofing system to enhance the lifespan of your flashing. It’s possible in several ways.
- You should inspect the flashing every spring and fall. It helps detect any cracks, rust, and gaps.
- How to fix roof flashing? Remove all the moisture and debris around the flashing. Otherwise, it leads to roof issues.
- Sealant reapplication is beneficial every few years to maintain the waterproof barrier.
- Conduct professional roofing and flashing inspections, as well as preventive measures for better flashing issue prevention.
Conclusion
To conclude, how to fix roof flashing? Homeowners or DIY users can handle their damaged roof flashing when they follow specific steps. They can maintain and protect their roofing systems’ integrity without requiring extensive repairs or costs.
FAQs
Can I fix roof flashing myself?
Yes, if you’re comfortable with heights and have basic DIY experience. Simple repairs like resealing or replacing small sections are doable. For chimney flashing or steep roofs, it’s safer to hire a professional roofer.
Should I replace shingles when fixing flashing?
If the flashing is under or integrated with the shingles, you may need to lift or replace a few shingles during the repair. Damaged shingles should always be replaced to prevent future leaks.
What type of sealant should I use on roof flashing?
Use a high-quality roofing sealant or roofing cement that’s weather-resistant and compatible with metal and shingles. Avoid household silicone, which may not bond well on roofing materials.